🌐 Multiplayer (Beta)
The following guide will help set up multiplayer in your uPhone project.
Multiplayer is currently a work in progress. Please submit a ticket if you see any weird behaviours or bugs.
Photon Fusion v1 Installation
Step 1 - Create Account
Create a Photon account.
Step 2 - Download Fusion
Download the SDK.
Step 3 - Install Fusion
Install the SDK. Click and drag the Unity Package into your project and import the files.
Step 4 - Fusion Setup
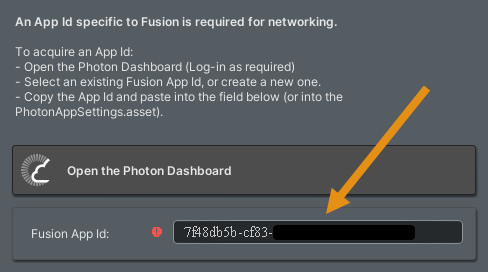
Add your App Id to Fusion's welcome window. (Fusion > Fusion Hub)

Step 5 - Photon Voice (optional)
Install Photon Voice for voice support.
Step 6 - Photon Setup Wizard
Click Window > Photon Unity Networking > PUN Wizard
Click Setup Project

Close the PUN Wizard.
Step 7 - Photon Voice Extra Steps
Click Window > Photon Voice > Remove PUN to remove PUN which isn't needed.
Now go to Assets/Photon/PhotonVoice and delete the Demos folder.
Photon Fusion and Voice integration is now installed! You should be able to use uPhone's networking features.
We recommend adding:
/[Aa]ssets/[Pp]hoton/
/[Aa]ssets/[Pp]hoton.meta
to your .gitignore if you wish to keep Photon Fusion out of git source control.
(README) Network Providers
uPhone uses network providers to drive the multiplayer side of the asset. These will need to be dragged-on depending on what type of network solution you want to use.
For singleplayer networking:
There should only be a single network provider in-scene for all local phone controller templates.
Go to Assets/uPhone/Scripts/Runtime/Networking and drag PhoneLocalNetworkProvider.cs into your chosen scene.
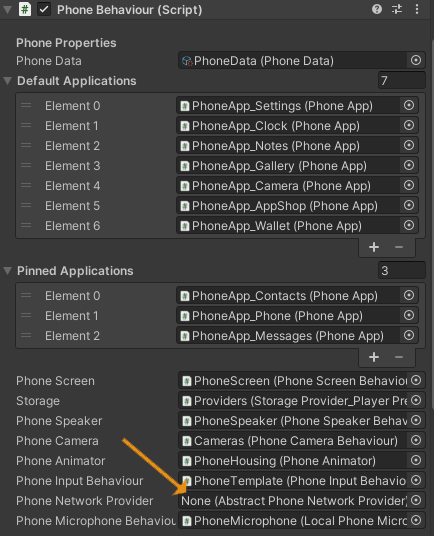
Ensure all of your PhoneBehaviour.cs scripts have the newly created network provider script dragged-onto their residing network provider serialised fields, demonstrated in the following:

For multiplayer Photon Fusion networking:
Each fusion controller prefab should have their own network provider. So long as you're dragging the photon fusion controller template into a fusion scene then it should work as intended.